Getting Started#
This documentation assumes basic familiarity with Python and async/await. If you need a refresher on any of these topics, here's a few helpful resources:
Resources for learning more
Basic Python
async/await and asyncio
No prior experience with making Discord bots is required.
Installation#
To install arc, run the following command in your terminal:
To make sure arc installed correctly, run the following command:
If successful, it should output basic information about the library.
Note
Please note that arc requires a Python version of at least 3.10.
Setting up a Discord Bot#
Tip
If you already have a Discord bot set up and a token ready to go, skip to the next section.
The first step to creating a Discord bot is to create a bot user on the developer portal. Navigate to the developer portal and create a new bot:
-
Create a new application
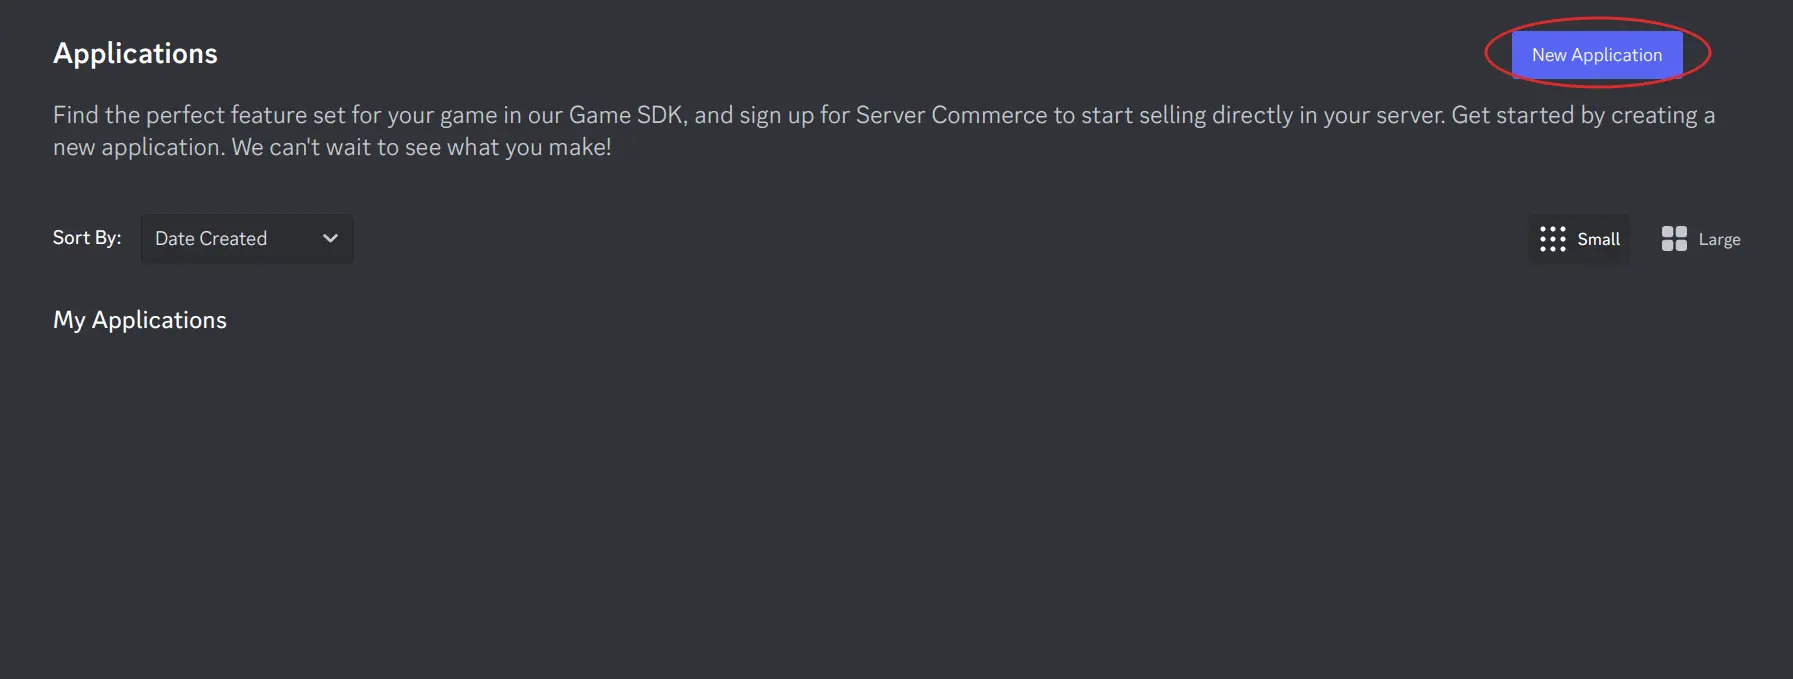
By creating an app you accept Discord's Developer Terms of Service. -
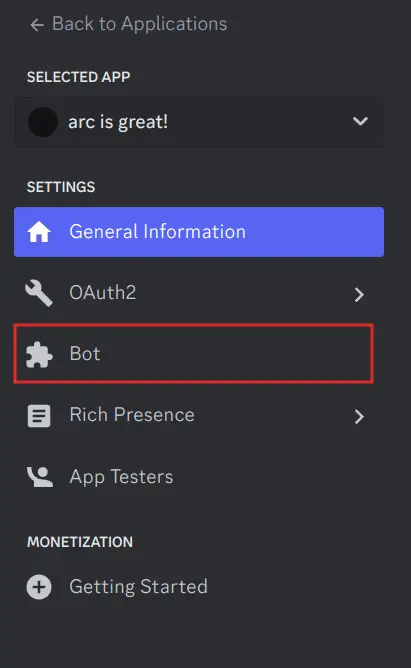
Navigate to the bot tab
-
Create a new token
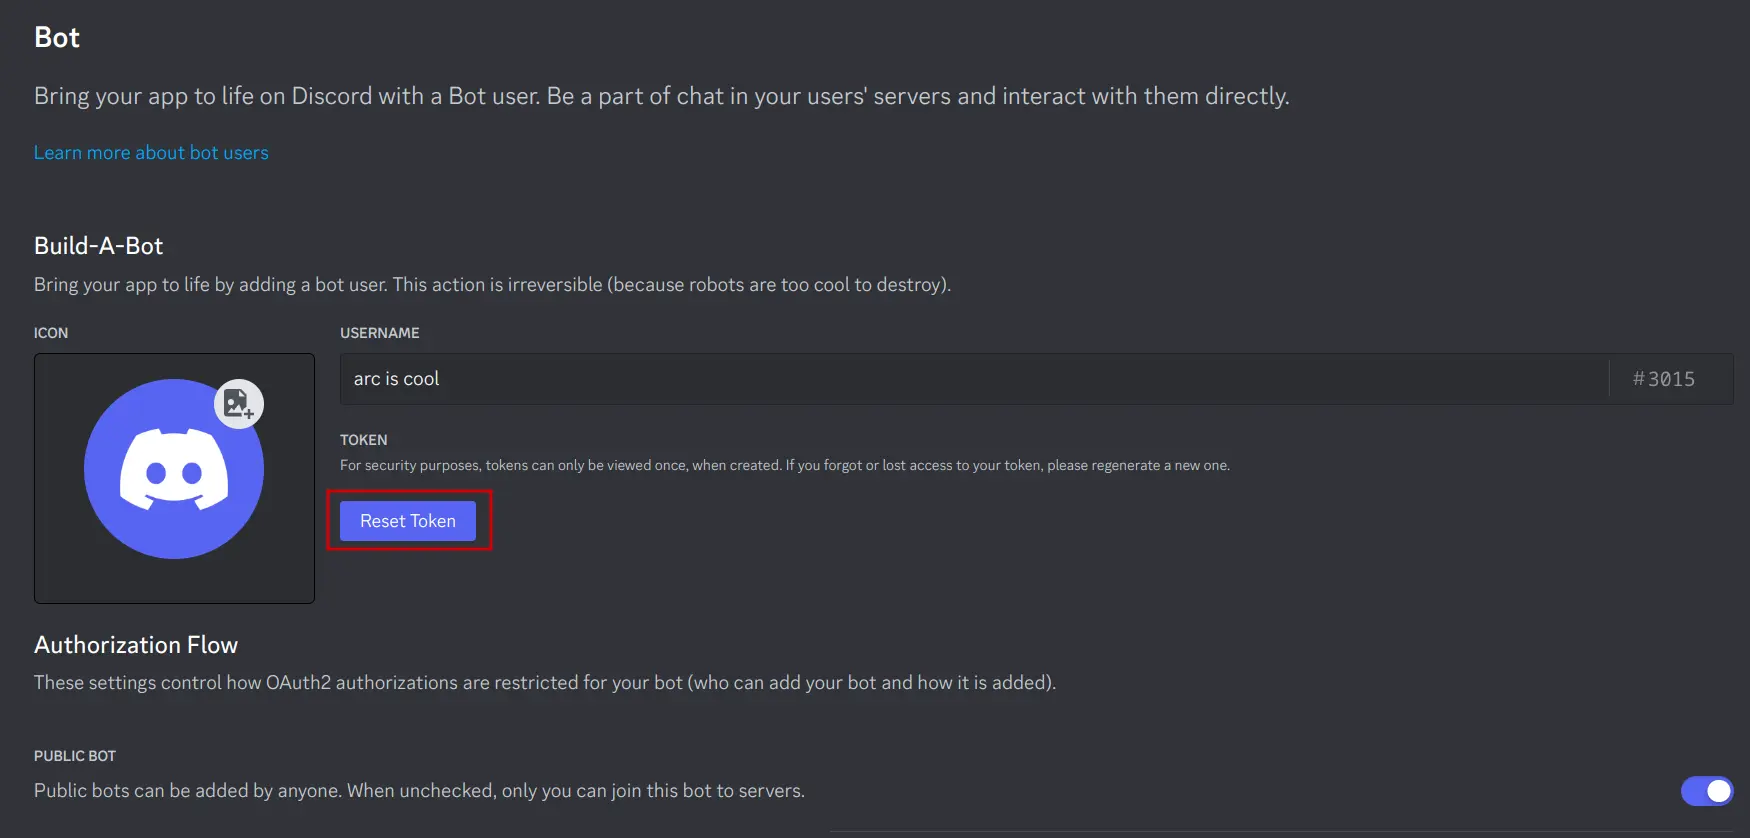
Keep this token for later, you'll need it to start your bot. -
Invite the bot
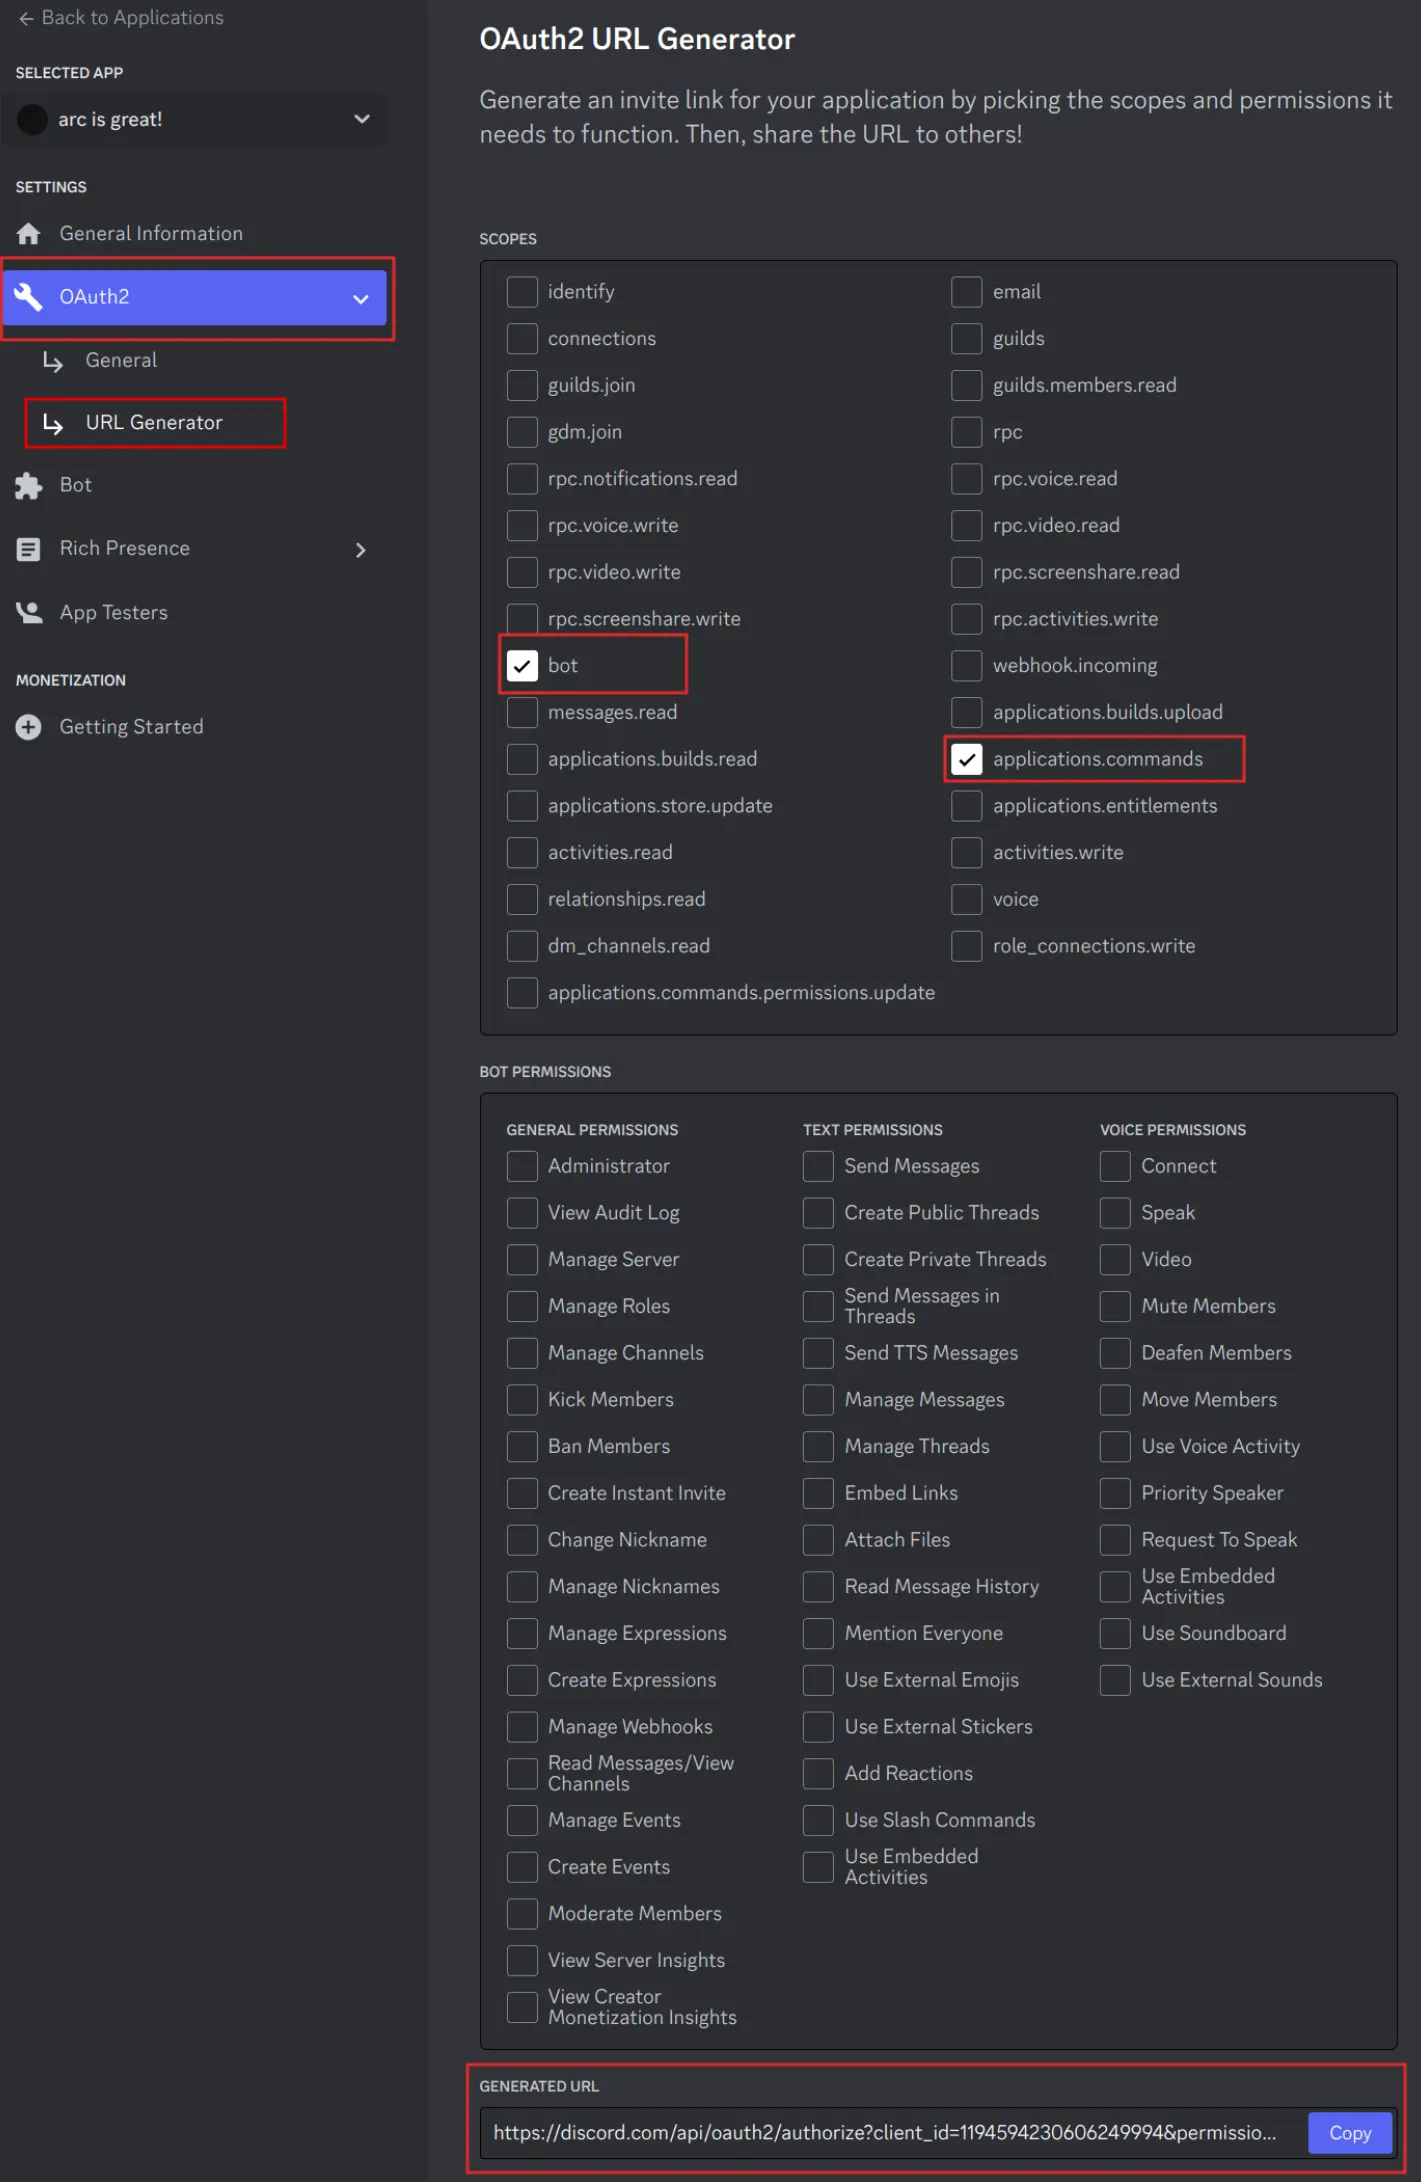
Tick any permissions your bot will need as well.
Danger
Anyone with access to this token has full access to your bot's account, you should ensure that nobody has access to this token but you. Treat it like a username/password combination, but for bots.
Additional steps for REST Bots
For most people, these steps are not required, however if you're setting up a RESTBot, you need to perform these additional steps to get going.
If you're unsure if you need this, see the difference between REST & Gateway bots.
-
Get a URL for your interactions
You'll need a URL with port
8080accessible and visible to the open internet with TLS (https://). Hold on to this URL for the next step.Tip
There are multiple services available that let you generate temporary URLs that meet these criteria for local development, such as :simple-visualstudiocode: Visual Studio Code's built-in port-forwarder, or localhost.run. If you're using such services, ensure the URL is publicly accessible.
Some of these services may also randomly assign a new URL to you when you repeat this process, in that case you should update the interaction URL on Discord's developer portal as well, to keep them in sync.
-
Add the interaction endpoint URL
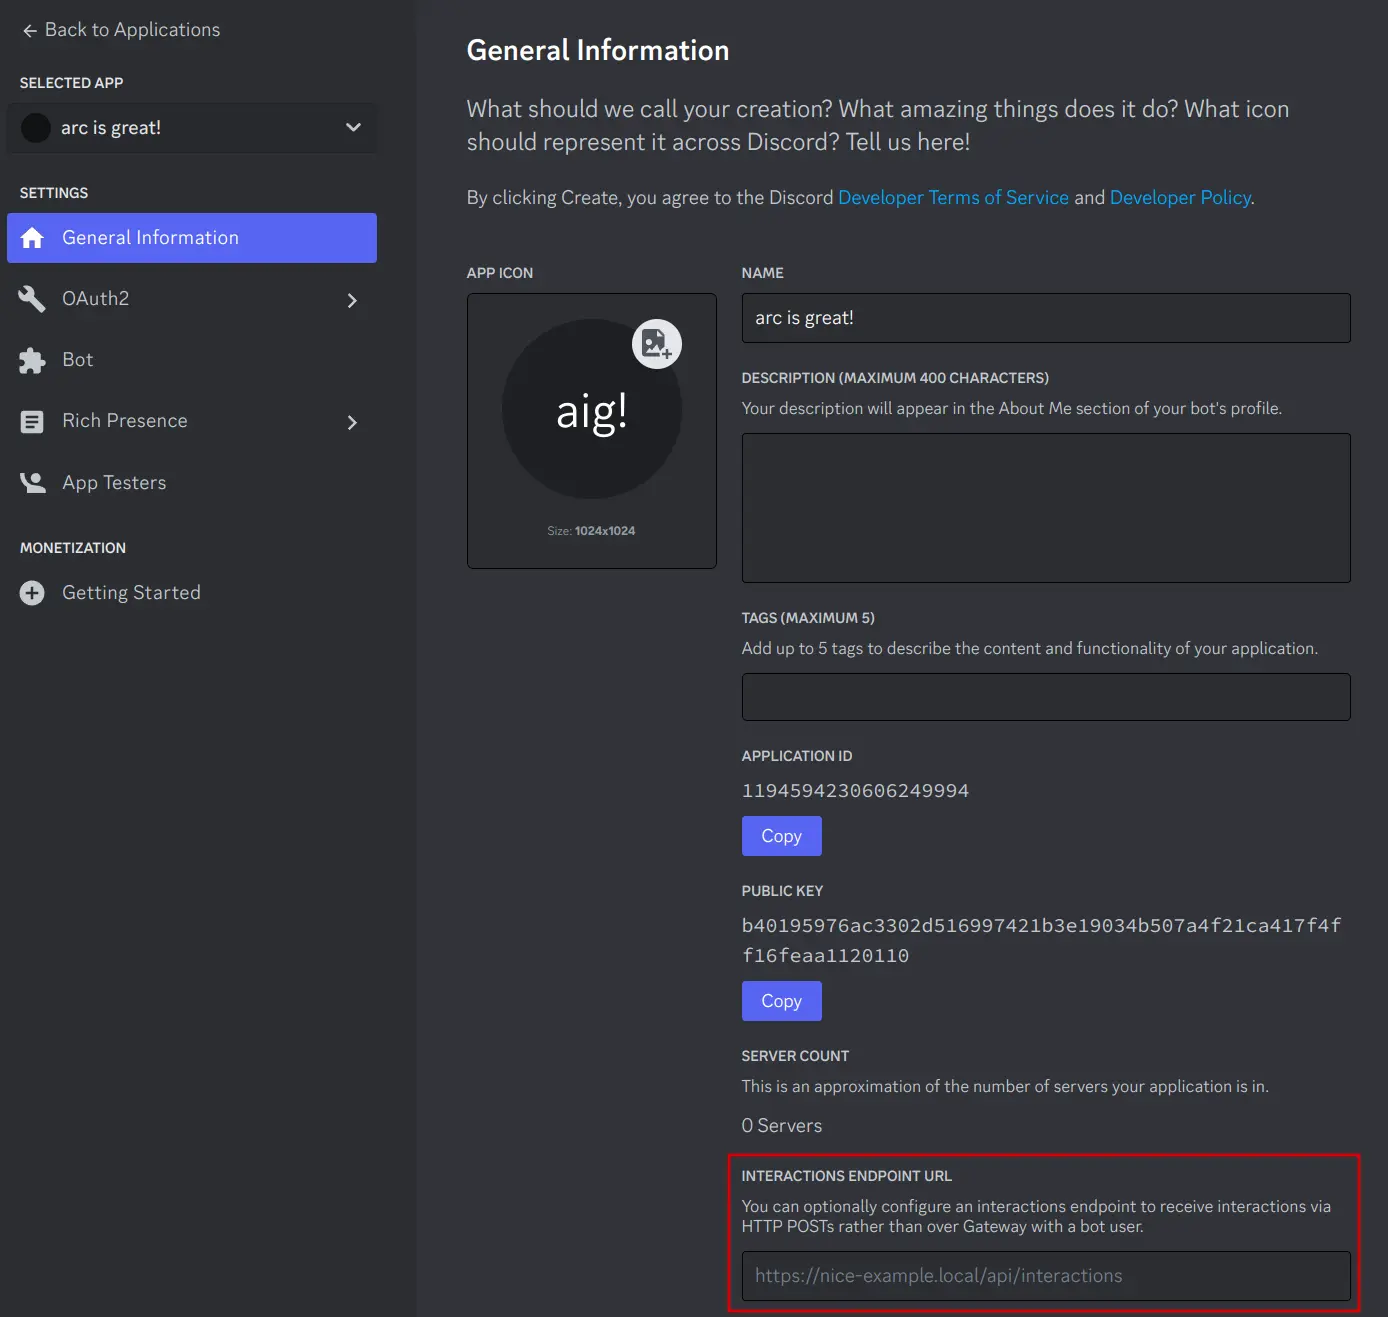
Note
You will need to have a RESTBot running and responding to interactions at this URL for Discord to accept the URL as valid. You can briefly run the basic REST example for this purpose, shown below.
Basic Usage#
import hikari
import arc

# Create an instance of a GatewayBot
# Paste your bot token from the dev portal in here
bot = hikari.GatewayBot("TOKEN")

# Pass it to arc
client = arc.GatewayClient(bot)


@client.include # Add it to the client
@arc.slash_command("hi", "Say hi to someone!") # Define a new command
async def hi_slash(
    ctx: arc.GatewayContext,
    # Add a new slash option that asks for a user
    user: arc.Option[hikari.User, arc.UserParams("The user to say hi to.")]
) -> None:
    await ctx.respond(f"Hey {user.mention}!")

# This should be the last line, no code will be run after this
bot.run()
import hikari
import arc

# Create an instance of a RESTBot
# Paste your token from the dev portal in here
bot = hikari.RESTBot("TOKEN")

# Pass it to arc
client = arc.RESTClient(bot)


@client.include # Add it to the client
@arc.slash_command("hi", "Say hi to someone!") # Define a new command
async def hi_slash(
    ctx: arc.RESTContext,
    # Add a new slash option that asks for a user
    user: arc.Option[hikari.User, arc.UserParams("The user to say hi to.")]
) -> None:
    await ctx.respond(f"Hey {user.mention}!")

# This should be the last line, no code will be run after this
bot.run()
Warning
For the purposes of this example, the token is inserted directly into the source file. You should try to avoid doing this, and instead store the token in a .env file or similar.
Paste the code above into a file and run it. The bot should start, register the command you defined, which should now be invokable via /hi in any server the bot is present in.
Troubleshooting common setup mistakes
I'm getting 401 Unauthorized when starting the bot!
Ensure that your token is valid, and that you have copied the bot token, and not the application secret or some other credentials. If unsure, refer to the third step of setting up a bot and create a new token again.
The bot starts but doesn't respond to the slash command!
If you're using a RESTBot, ensure the interaction URL is set up properly and is valid on the developer portal. If you're using a GatewayBot, ensure there is no interaction URL set at all.
The bot is failing to create commands!
Ensure that the invite link you invited the bot with has the bot and application.commands scopes ticked. If unsure, refer to the fourth step of setting up a bot and reinvite the bot.
Everything seems fine but I hit / and the command isn't there!
The Discord client is sometimes a little too aggressive when it comes to caching commands. You should try reloading the app via Ctrl + R.
Difference between GatewayBot & RESTBot#
Tip
If you're unsure which one to choose, it is recommended to get started with a Gateway bot.
There are two main ways for a bot to connect to Discord & receive interactions, via either a GatewayBot or a RESTBot.
A bot connected to the Gateway needs to maintain a constant connection to Discord's servers through a WebSocket, and in turn receives events that inform it about things happening on Discord in real time (messages being sent, channels being created etc...). Interactions are also delivered to a bot of this type through the Gateway as events. In addition, Gateway bots typically have a cache and can manage complex state. This model is ideal for bots that need to do things other than just responding to slash commands, such as reading and responding to messages sent by users, or acting on other server events (e.g. a moderation bot).
A RESTBot however, isn't constantly connected to Discord, instead, you're expected to host a small HTTP server, and Discord will send interactions to your server
by making HTTP POST requests to it. RESTBots only receive interactions from Discord, they do not receive events or other types of data. They are ideal for bots that manage little to no state,
and rely only on users invoking the bot via slash commands. Setting up a RESTBot however is slightly more complicated compared to a GatewayBot, as it requires a publically accessible domain with TLS for Discord to be able to send interactions to your webserver.
Does this mean a Gateway bot cannot use the REST API?
No. Both Gateway & REST bots have access to the HTTP REST API Discord provides (see how), the primary difference between the two bot types is how Discord communicates with your bot, and what information it sends to it.
Recommended tooling#
arc works best when you use a static type-checker. It can ensure your code is correct and detect type errors without you even running your code! It's not required to use one, but is highly recommended, as arc was made with type-safety in mind. For more information on types and type-checking, see the types guide.
Install pyright (optional)#
The recommended type-checker for arc is pyright.
VS Code ships pyright with the Python extension, however it is disabled by default. To enable it, navigate to File > Preferences > Settings and search for python.analysis.typeCheckingMode. Set this to either "basic" or "strict". For more information on using Python with VS Code, see the official documentation.
See the installation instructions on how to set up pyright.
So I have a bot, now what?#
You made it! Congratulations on creating your first Discord bot with arc! Check out the guides page and decide where to go next. If you feel lost, or have questions to ask, you may join the hikari Discord server and ask for help in the #arc channel.